

A beautiful new floor depends on more than the material you choose. Knowing how to prepare for a professional flooring installation means clearing the work area, making sure the subfloor is sound and level, checking door clearance, and planning for dust and heavy-item moves. These practical steps help create a safer, smoother start for the installation.
It’s natural to focus on the finished look, but preparation makes the work area easier to access and helps protect the rest of your home. This guide explains how to spot subfloor concerns, check door clearance, limit dust, and protect finished surfaces when moving furniture or appliances. You’ll also learn what to clear before installers arrive and which tasks belong in the installation plan.
Key Takeaways
- Look for moisture, loose spots, and uneven areas in the subfloor before new flooring goes down.
- Consider how the new floor’s height may affect door movement and clearance.
- Plan dust barriers around the work area to help keep dust from spreading through your home.
- Clear a path for furniture and appliances, and use protective materials to reduce the risk of scuffs and scratches.
1. Preparing and leveling the subfloor
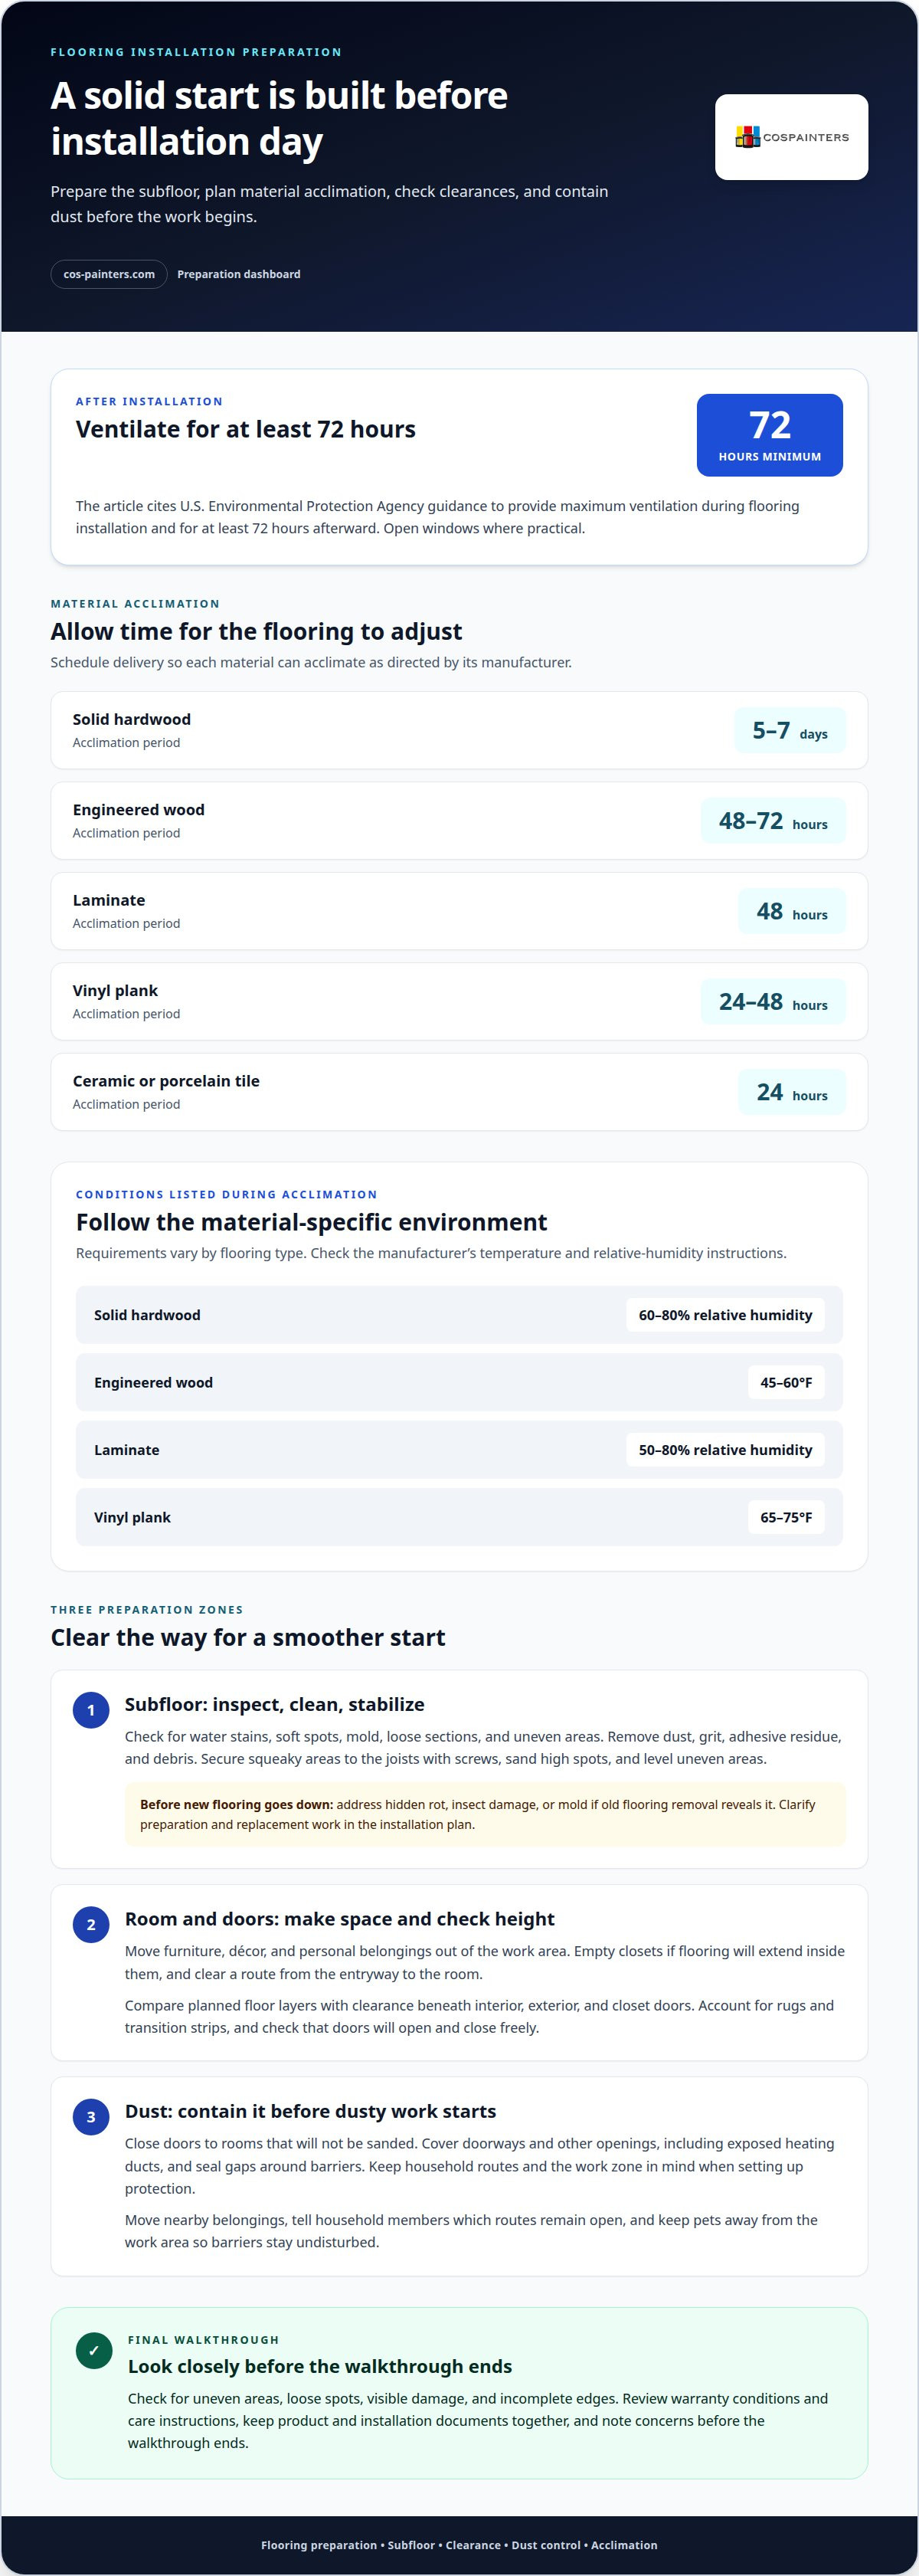
Before installation, inspect the exposed subfloor for water stains, soft spots, mold, or loose sections. Remove dust, grit, adhesive residue, and other debris so the surface is clean. A sound base should be flat, smooth, securely fixed to the floor joists, and level. Secure squeaky areas to the joists with screws, sand high spots, and level uneven areas. Then vacuum and remove debris. These are essential steps in how to prepare for a professional flooring installation.
Ask how the installation plan handles subfloor preparation and replacement, since removing old flooring can uncover rot, insect damage, or mold. Hidden damage may add to the final bill and needs attention before new flooring goes down. Humidity, debris, or an unstable base may also affect warranty coverage. For wall-to-wall carpet over ground-contact concrete, especially in a basement, the U.S. Consumer Product Safety Commission recommends an effective moisture barrier.
What flooring materials require acclimation, and how long should they acclimate? Solid hardwood typically needs 5-7 days; engineered wood needs 48-72 hours, laminate 48 hours, vinyl plank 24-48 hours, and ceramic or porcelain tile 24 hours. Follow each manufacturer’s temperature and relative-humidity requirements. When planning how to prepare for a professional flooring installation, schedule delivery so the material can acclimate as directed.
What are common installation risks or mistakes, and how can homeowners prevent them? Skipping moisture checks, leaving debris, or installing over an uneven or loose subfloor can cause problems. Inspect the surface and address defects before work proceeds, and acclimate flooring according to its manufacturer’s instructions.
At the final walkthrough, look for uneven areas, loose spots, visible damage, and incomplete edges. Review the product warranty conditions and care instructions, keep product and installation documents together, and note any concerns before the walkthrough ends.
2. Checking floor height and door clearance
A new floor can raise the finished surface, particularly when underlayment or new material sits above the existing floor. Compare the planned floor layers with the clearance beneath each door. Check interior, exterior, and closet doors, as well as doors that swing across thresholds. Include rugs and transition strips in your assessment to make sure doors will still open and close freely.
Clear the installation area before work begins. Move furniture, décor, and personal belongings out of the room, and empty closets if the new flooring will extend inside them. Remove items from shelves or storage areas that could block access or collect dust. Clear a path from the entryway to the work area, and decide where materials can be placed. For built-in storage, plan how the floor edge will meet the closet threshold.
Existing flooring may need removal if it prevents a flat, compatible surface. Hardwood renovation preparation can also involve removing baseboards, trim, shoe molding, and doors. Removal cost depends on the material, layers, adhesive, and any subfloor repairs, so clarify the work and pricing in your project quote.
Building codes and HOA rules depend on the project and property. An HOA may have its own requirements for renovations or flooring changes. Consider these before scheduling, particularly if the project changes the building structure or affects shared spaces.
What indoor temperature and humidity conditions are recommended before flooring installation? Follow the flooring manufacturer’s requirements, which vary by material. During acclimation, listed conditions include 60-80% relative humidity for solid hardwood, 45-60°F for engineered wood, 50-80% relative humidity for laminate, and 65-75°F for vinyl plank. For a smooth transition from room preparation to installation, explore professional flooring installation.
3. Controlling dust during installation
Cutting, sanding, and removing flooring can spread dust and debris beyond the room. An open doorway can let particles drift into a hallway, while uncovered heating ducts can carry dust to other rooms. Plan containment before dusty work begins. Identify affected rooms, household walkways, and openings that need protection.
Close doors to rooms that won’t be sanded, then cover doorways and other openings leading from the work area. Include heating ducts: protective film over exposed duct openings can help limit circulating dust. Keep barriers in place during dusty work and avoid gaps around door frames or other covered openings.
Set up and seal dust barriers before covering nearby surfaces. Creating a controlled work zone first helps keep dust away from furniture and belongings. For example, seal the flooring-room entrance, then cover nearby surfaces that remain exposed. Where possible, keep the route from the entryway to the work area inside the protected zone.
Before installers arrive, move belongings away from the work boundary and close doors to unaffected rooms. Items beside an open doorway, such as a television or shelf, can collect airborne dust even when work stays in one room. Tell household members which routes remain open, and keep pets away from the work area so barriers stay undisturbed.
Ventilation also matters during and after flooring work. According to the U.S. Environmental Protection Agency, provide maximum ventilation during installation and for at least 72 hours afterward. Open windows where practical, and keep the dust barriers and HVAC duct protection in place during dusty work. Remove coverings carefully after the work area is cleaned, so trapped debris doesn’t spill into adjoining rooms.
Before dusty flooring work, close off rooms that will not be sanded and cover doorways, other openings, and exposed heating ducts with protective film to help limit circulating dust.
4. Protecting floors when moving furniture and appliances
Clear furniture, personal items, and décor from the installation area. Move belongings elsewhere and create an open route between the entryway and work area. Remove wall art, mirrors, family photos, and long window-treatment panels that could be bumped during large-item moves. Unplug electronics that obstruct access.
Before flooring installation, empty drawers and shelves, secure loose parts, and group smaller belongings away from the work zone. Keep pets elsewhere while installers work. For appliances, plan a clear route and use thin Masonite sheets to protect the floor beneath them during movement.
Protect the new floor when moving appliances and furniture back into place. Use felt or furniture pads beneath legs and support bases, and avoid dragging heavy items across the finished surface. Masonite sheets can provide a temporary path for appliance movement; pads help prevent scratches once furniture is positioned.
Safety begins with keeping people clear of active work and cutting areas. Leave lifting and flooring cuts to the installation crew, and follow their directions around tools and materials. If an appliance requires gas or electrical disconnection and you’re unsure how to do it safely, have a professional handle the connection. Don’t move connected appliances through an obstructed path.
Before the room is cleared, identify fragile belongings and exposed surfaces along the moving route. Relocate glass décor, lamps, and small electronics; cover or move nearby items that could be struck by a sofa or refrigerator. Once the new floor is ready, return large items carefully and place protective pads before setting them down. For a coordinated flooring project, schedule professional flooring installation.
Before installation begins, homeowners should clear the hardwood flooring installation area and move furniture, personal items, and decor into another room. Keeping those belongings out of the work area also leaves the route available for planned furniture and appliance moves.
Thin Masonite sheets can protect the floor during appliance movement. When furniture is returned, felt or furniture pads can protect the floor beneath legs and support bases. Use each protection at the appropriate stage to reduce direct contact with the new surface.
Colorado Springs Painters: Flooring
Colorado Springs Painters provides flooring installation for homeowners ready to move from preparation to a refreshed room. Turn to the team when you’ve chosen new flooring and want professional help carrying the project through installation, including the practical considerations covered in this guide. A clear plan for the room, subfloor, door clearance, dust control, and furniture movement helps set expectations before work begins. If flooring is part of a broader update, the company also offers interior painting, exterior painting, and commercial decorating. Contact Colorado Springs Painters to discuss your flooring project and the changes you’re planning for your home.
Make your flooring plans the start of a refreshed space
A flooring project can shape how a room feels and functions long after installation. Consider how the new surface will suit everyday use and the look you want. Knowing how to prepare for a professional flooring installation gives you a practical starting point for planning the work and creating a refreshed space.
Colorado Springs Painters can help with flooring installation and broader property updates, including interior and exterior painting and commercial decorating. Share what you’re hoping to change and request a free, no-obligation quote.
Contact Colorado Springs Painters to discuss your flooring plans. A thoughtful beginning can lead to a space that feels newly yours.
Frequently Asked Questions
What should homeowners do before professional flooring installation?
Before installation, settle practical decisions that could interrupt the work, such as where household members will enter and which rooms need to stay accessible. Keep flooring labels and product paperwork together, and note visible concerns, such as a recurring damp patch or loose threshold. Clarify whether furniture moving and subfloor preparation are included in the installation plan.
How do installers prepare and inspect the subfloor before installing new flooring?
Where needed, installers assess the base after removing existing materials, since concealed damage becomes visible only when the surface is exposed. They look for signs of moisture, unstable sections, and areas that could interfere with the selected flooring. Preparation may involve securing loose areas, sanding high spots, or leveling uneven sections, then clearing debris before installation.
What should homeowners expect during installation, including noise, dust, and access restrictions?
Expect periods of tool noise, particularly during cutting or surface preparation, and keep the work zone clear while installers are active. The safest route is to avoid walking through the installation area and use another entrance or room when practical. Dust barriers can limit spread, but nearby surfaces may still need cleaning afterward. Keep children and pets away from tools, materials, and active work areas.


